Article about: Hi all As most of you are aware, I have been searching an old USAAF base for the past 2 years or so. With over 32 visits to the site, I had amassed a rather large collection of stuff, includ
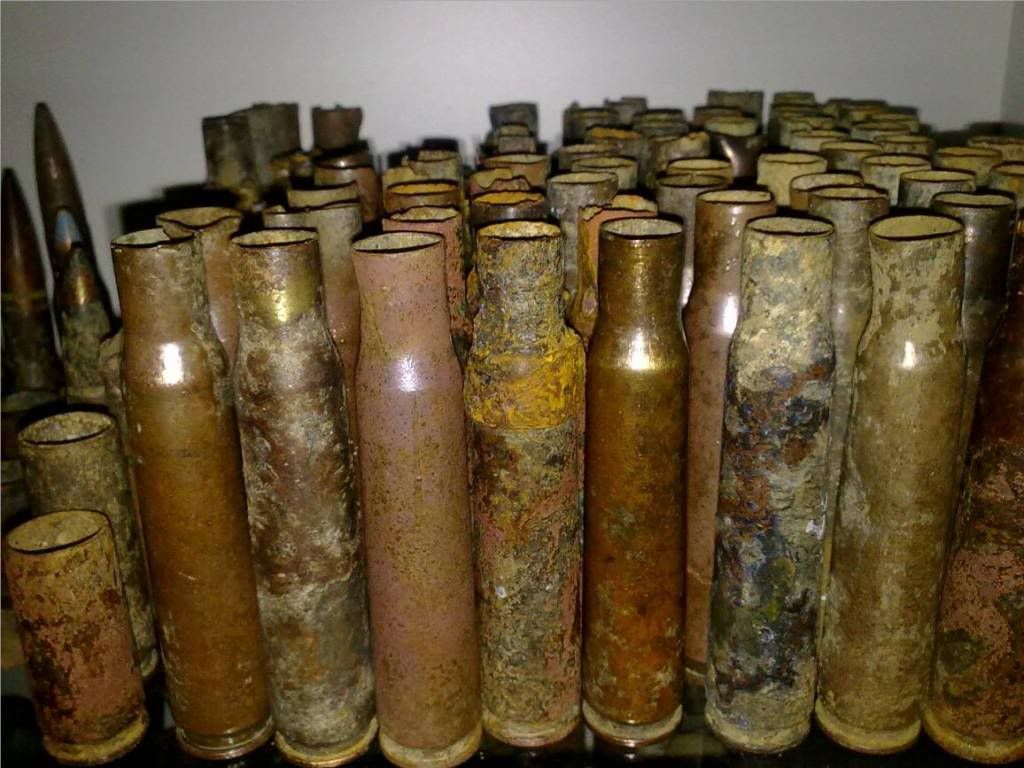
As most of you are aware, I have been searching an old USAAF base for the past 2 years or so. With over 32 visits to the site, I had amassed a rather large collection of stuff, including around 150 .50cal spent cartridge cases. They were in various states of decay from near perfect to falling to bits as soon as you look at them.
You may also be aware that I visited an old air gunnery school a few weeks back and returned with a bucket full of spent .50calibre bullets.
I decided to create a display piece and restore them back to what they looked like when they left the factory.
So....
Here we go.....
Firstly this is what the cartridges looked like.
And this is what the bullets looked like.
Ok so this is what I did.
All done with a dremmel multi tool wotsit.
1. Using a fine grade sandpaper flap wheel, I removed the top layer of dirt and a very fine layer of metal to get under the 'oxidisation'. (You need to wear a dust mask when you do this as the amount of dust produced is amazing !)
2. I then used a very fine grade emery paper 'disc' and removed the scouring left by the flap wheel.
3. I then used a polishing paste and a buff wheel using a relatively low speed. This tends to make the metal get rather warm so you have to move quickly.
4. I then used a buffing cloth 'disc'.
5. Last step was a good rub down with Brasso wadding. If there were still serious scuff marks, I repeated steps 3, 4 and 5.
6. Because this method reduces the diameter of the bullets very slightly, they then had to be glued in place otherwise they just fall to the base of the cartridge. I used evostick 'seriously strong glue'.
7. Using enamel paint, I coloured the tips using another relic bullet as a guide to show where the paint went down to.
8. Left to dry.
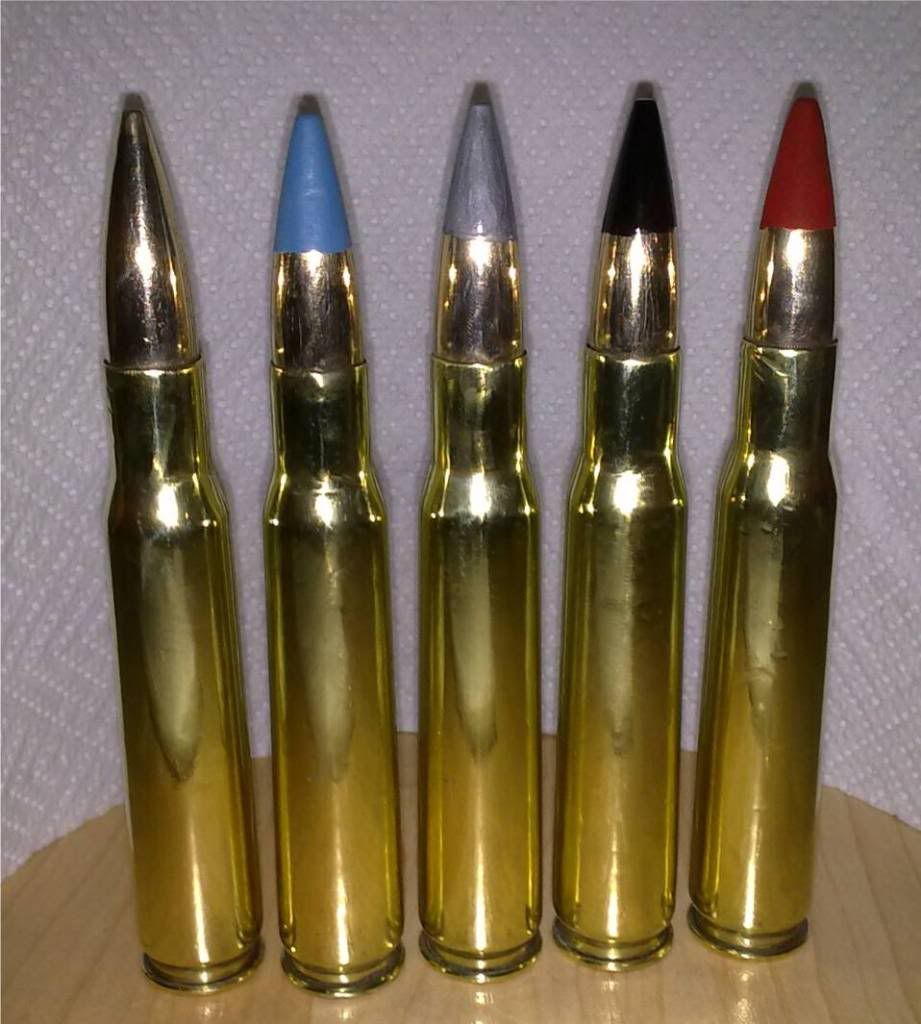
And the results......
What do you think ?
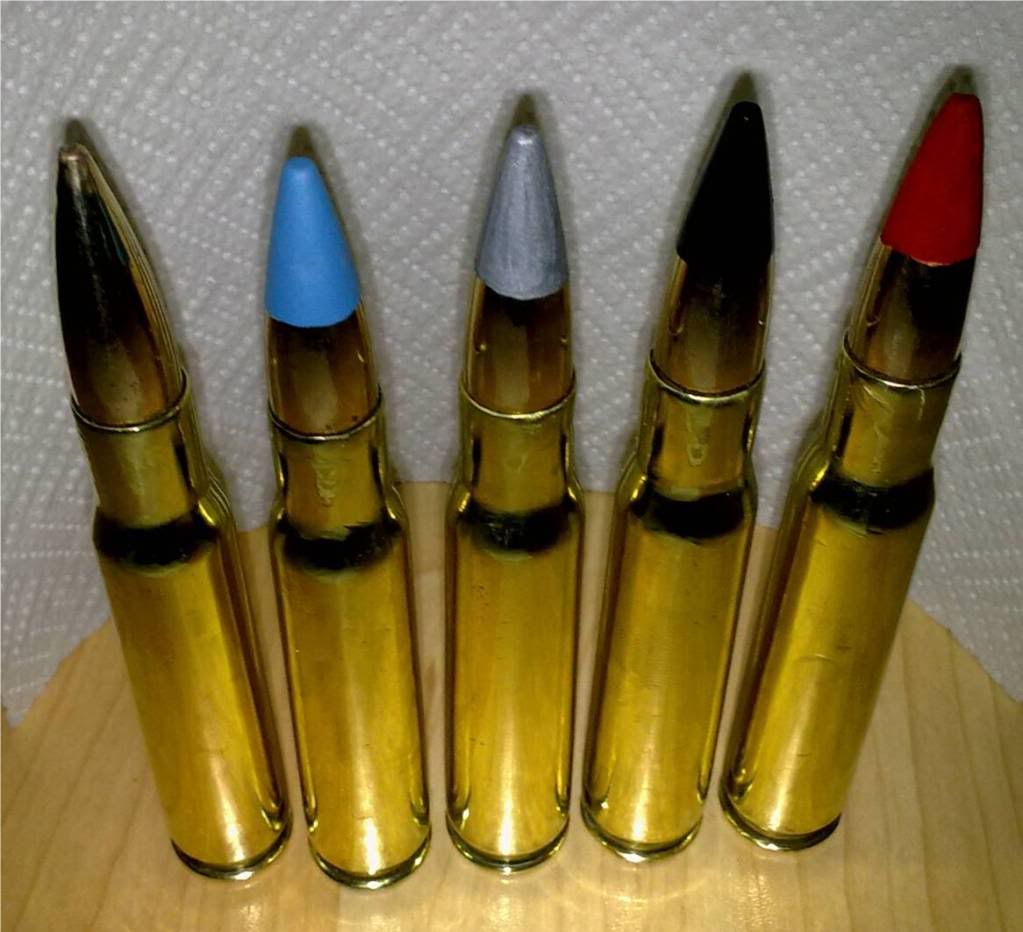
From slightly above.....
All in all these five took me around 5 hours to do. Well worth it.
They are, from left to right, Standard Ball round (plain tip), Incendiary (light blue), Armour piercing incendiary (aluminium), Armour piercing (black), tracer (red).
All I need now is some genuine WW2 .50cal links to complete the display.
Anyone got any spare they are willing to part with ? I'll pay of course. Please PM me if you have.
good job mate, they are gleeming,
heres what i do..... if you can get your hands on a pillar drill, you can put the spent cartridge case in the chuck, press start button and holding the emery paper against the cartridge it cleans em lovely with no effort at all, then simply apply ya polish in the same way
Gibba........I do have a pillar drill, only problem is the cartridges tend to be very brittle as they have been mostly dug from marshy ground. I have had one or two crumble due to the pressure of the chuck so don't like to use that method.
Wow Steve they're awesome, they're now better than new. Its hard to imagine they're spent 70 years below ground, makes mine look pitiful. Your cleaning technic and dedication are outstanding. Very impressed with your work.
LUCKYSTRIKE
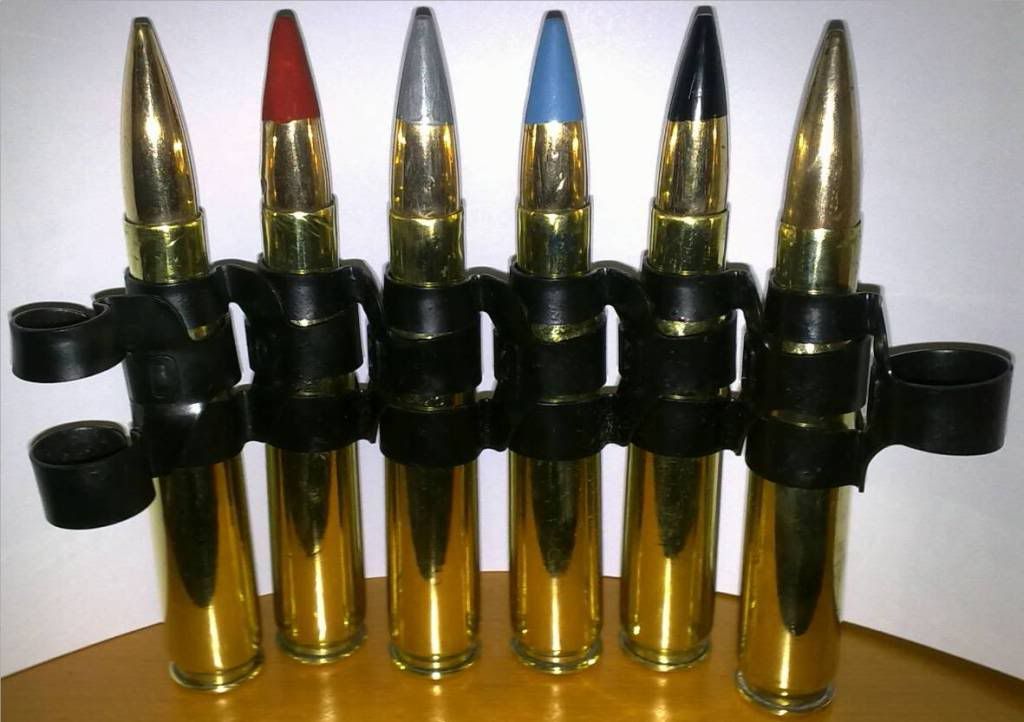
With a little help from Ade, (thanks again ), I was able to purchase some genuine WW2 .50cal links from a gentleman that owns a small museum. Indeed, the links I got were in their original box !
So, the cartridges now sit in their own links. And I added a cartridge I had restored a year or two ago (although it needed re-polishing ).
I only can say great job at that! They really look stunning and brandnew from the factory.
I wouldn't do the same because i love the way they are after these many years. I love the tear en wear on ammo found.
I agree with you my friend. I MUCH prefer them in relic condition and rarely do this to my finds. However, seeing as I have over 150 .50cal cartridges in relic condition, restoring 5 of them really doesn't matter......I still have 145 in relic condition


 ,
,


Bookmarks